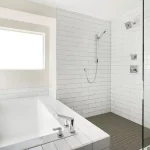
When it comes to DIY projects, it’s easy to get caught up in the excitement of finally tackling that tub and tile renovation you’ve been dreaming of. However, as you start to dig into the project, you may find that your experience doesn’t quite match up with the tutorials you’ve read. This is especially true when dealing with tricky areas like the gap between the bathtub and the tile.
If you’re facing a larger than average gap between the top of your bathtub and the bottom of your tile, you may be wondering how to properly caulk the area to prevent leaks. Luckily, there are techniques you can use to ensure your caulking job is a success. In this article, we’ll explore the best ways to tackle this common problem and ensure your tub and tile renovation goes smoothly.
Step 1 – Identify the Reason
The first step to addressing a gap in your bathtub tile is to determine the reason for the gap. If the gap is large, such as ½”, it is important to evaluate why it exists. If the bathtub has sunk, this may indicate a larger issue that needs to be addressed. However, if the gap is due to shoddy craftsmanship or a material shortage, it may be possible to cover up the mistake and achieve a completed look that hides the flaw. In cases where the gap is excessively large, you may need to add an additional row of cut tile or select a smaller, matching or complimentary tile to fill in the bottom row.
Step 2 – Use a Backer Rod
To fill gaps larger than the thickness of a standard caulk bead, you can use a product known as backer rod. Backer rod is a flexible foam material that comes in a roll and looks like a coiled garden soaker hose. It is easy to use, cut, and manipulate into place.
To use backer rod, first measure the thickness of your gap and purchase a roll of backer rod that is slightly larger in thickness. Cut the length you need for one side of the bathtub and use a putty knife to press the backer rod into place as you move down the length. Position the backer rod slightly behind the surface of the tiles. Continue around the tub until the gap is filled on all three sides.
Sometimes, your gap is larger on one side of the tub than the other due to the imprecise square of a wall, ceiling, or floor. In this case, simply fill the spaces with the appropriate backer rod as needed.
Using a backer rod helps to ensure that the caulk adheres properly and provides a better seal. It also helps to prevent the caulk from cracking or pulling away from the surface over time.
Step 3 – Caulk
Now that the backer rod is in place, it’s time to apply the caulk. Cut the end off the tube of caulk, using the thickness at the neck of the tube as a guide for the size of the bead you want. Load the caulk into a caulking gun and secure it in place. Starting on the outer corner of the tub surround, pull the trigger in a consistent stream while moving at a steady pace.
Once the bead is in place, use a moistened finger to apply light pressure and run it across the surface. This will create a curved, finished look while filling all the gaps where water could enter the space. Keep a lint-free rag handy to wipe excess caulking as you work around the tub.
It’s important to use the correct technique when applying caulk. Be sure to work steadily and consistently, and use a razor blade or utility knife to remove any excess caulk. Once the caulk has dried, you can use grout to fill any remaining gaps.
Silicone caulk is a popular choice for waterproofing, but be sure to read the manufacturer’s instructions carefully before use. With the right tools and technique, caulking can be a simple and effective way to keep your bathroom dry and free from water damage.
Alternative
If you don’t want to use backer rod, you can use ceramic quarter round or PVC quarter round molding instead. Cut the material to size and dry fit it against the gap. Instead of filling the space, this option will place material in front of it, effectively blocking the gap. Use tub adhesive to attach the material once you have it cut to size. Once the quarter round is dry and secure, apply a thin bead of caulking around the outside top and bottom to block any water access points.